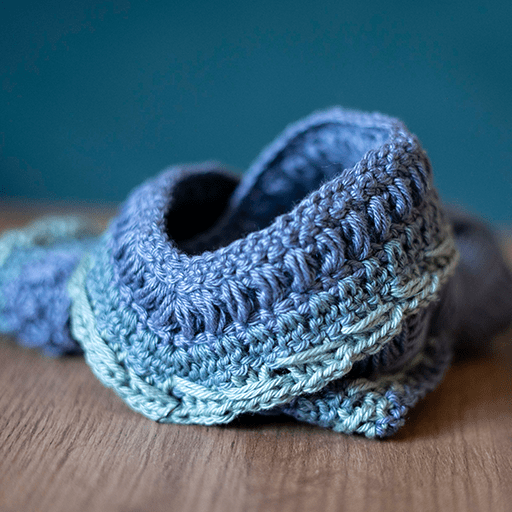
If you want to start learning elaborate and rich in texture crochet stitches then Alpine stitch is the one to start! In this post, we’ll explore the intricacies of the this stitch and provide step-by-step instructions to help you master this beautiful technique.
Alpine crochet stitch is a versatile and visually captivating technique that adds texture and depth to any crochet project. Learning it will open up a world of creative possibilities.
Understanding the Alpine Crochet Stitch
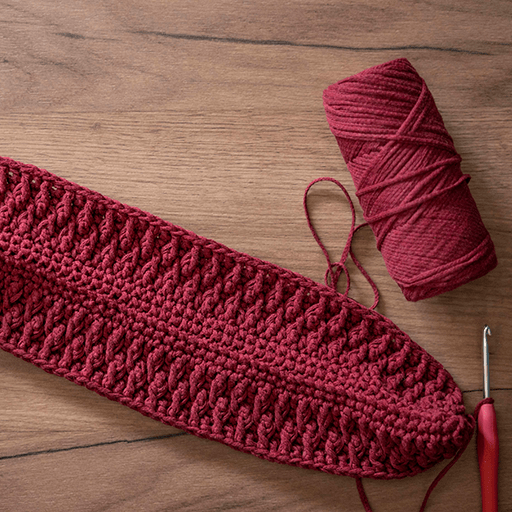
The Alpine crochet stitch, also known as the raised ripple stitch, is a variation of the traditional crochet ripple stitch. It creates a series of raised post stitches that resemble mountain peaks.
The textured diamond shapes on one side and a flat defined pattern on the other side has wide application, so the Alpine crochet stitch is used for baby blankets, pillows, throws, bags, and other accessories.
Although it looks very complex, actually this stitch is very easy to crochet.
The stitch pattern consists of alternating single crochet and double crochet stitches, worked in a way that creates the textured ridges. The resulting fabric is thick, warm, and visually stunning.
It uses just three stitches:
– single crochet stitch,
– double crochet stitch and
– front post double crochet stitch.
How to Crochet the Alpine Stitch – A Step-by-Step Guide
Instructions (in US terms)
ch – chain
st – stitch
sc – single crochet
dc – double crochet
FPdc – front post double crochet
Start with a foundation chain of any desired length, making sure it is a multiple of 4 plus 3 extra chains.
Row 1: 1dc in 3rd ch from hook, and continue dc in each ch to end.
Ch 1 (does not count as st) and turn.
Row 2: 1sc in each st to end.
Ch 2 (does not count as st) and turn.
Row 3: 1dc in first st, *1FPdc in corresponding dc 2 rows below, 1dc in next st*, repeat from * to* end.
Ch 1 (does not count as st) and turn.
Row 4: Repeat Row 2.
Row 5: 1FPdc in first dc 2 rows below, *1dc in next st, 1FPdc in corresponding dc 2 rows below, repeat from * to* end.
Ch 1 (does not count as st) and turn.
Row 6: Repeat Row 2.
Repeat rows 3 – 6 until needed and finish up on a row 2 repeat.

Repeat rows until the desired width is obtained. Finish off your work by fastening off the yarn and weaving in any loose ends.
So basically Alpine crochet stitch is a 4-row repeat pattern as follows:
1st row is double crochet all the way
2nd row is single crochet all the way
3rd row is alternate double crochet stitch and front post double crochet stitch
4th row is single crochet all the way
And for other rows just alternate 3rd and 4th row until desired length.
Tips for Success
- Use a hook size that complements your chosen yarn. Experiment with different hook sizes to achieve the desired texture and drape.
- Keep your tension consistent throughout the project to ensure even stitches.
- Take your time when working the raised post stitches, as they may require a bit more concentration and precision.
- Practice the stitch on a small swatch before starting a larger project to familiarize yourself with the technique.
- Be patient with yourself. Like any new skill, mastering the Alpine crochet stitch takes practice and repetition.
The Alpine crochet stitch offers endless possibilities for creating unique and eye-catching projects. By following this detailed guide and practicing the stitch, you’ll be well on your way to incorporating this beautiful technique into your repertoire. Get ready to embark on a creative journey that will bring texture and depth to your crochet creations.
Try it! Love it! Enjoy it!
Follow Bukolika.mk on Instagram and feel free to share what crochet topics, tutorials, or handmade traditions you would like to explore here in the future.