A crochet water bottle holder is one of the most practical and stylish accessories you can make. Whether you’re heading to the park, hiking a trail, visiting a market, or simply running errands, a handmade water bottle carrier keeps your hands free while ensuring your drink is always within reach.
This easy crochet project combines functionality with creativity. Made from durable cotton yarn, a crochet water bottle holder is lightweight, reusable, and environmentally friendly. Unlike disposable plastic bags, a crocheted bottle carrier can be used again and again, making it a sustainable choice for everyday life.
One of the best things about a crochet water bottle holder is its versatility. You can customize the size to fit different bottles, choose your favorite colors, and add long handles for comfortable carrying. The sturdy crocheted base provides support, while the openwork design keeps the holder lightweight and breathable.
For beginners, this project is an excellent way to practice working in the round, increasing stitches, and creating shaped sections. More experienced crocheters can experiment with textured stitches, color combinations, or decorative edging to make each holder unique.
A handmade crochet bottle holder also makes a thoughtful gift. It’s perfect for walkers, hikers, students, travelers, fitness enthusiasts, and anyone who likes to stay hydrated throughout the day. Pair it with a reusable water bottle for an eco-friendly gift set that is both useful and beautiful.
If you’re looking for a quick crochet project that is practical, affordable, and enjoyable to make, a crochet water bottle holder is a fantastic choice. Grab your yarn and hook, and create a stylish accessory you’ll use every day while reducing waste and adding a handmade touch to your routine.
The pattern
I believe that this is very simple but effective and appealing crochet item to make, and especially this design is very beginner friendly and easy to make in just one hour.
You can choose a yarn and a color to your own liking for this project. The yarn used in this video is super fine and the crochet hook is 3.0 or D/3.
To crochet this beginner friendly Water Bottle Holder there are three very easy steps:
Step 1. – crochet the base.
Step 2. – crochet the mesh body.
Step 3. – crochet the rim and the handles.
The following Abbreviations are used in the pattern description:
- MR = magic ring.
- ch = chain.
- sl st = slip stitch.
- sc = single crochet.
- dc = double crochet.
- sp = space.
- rep = repeat.
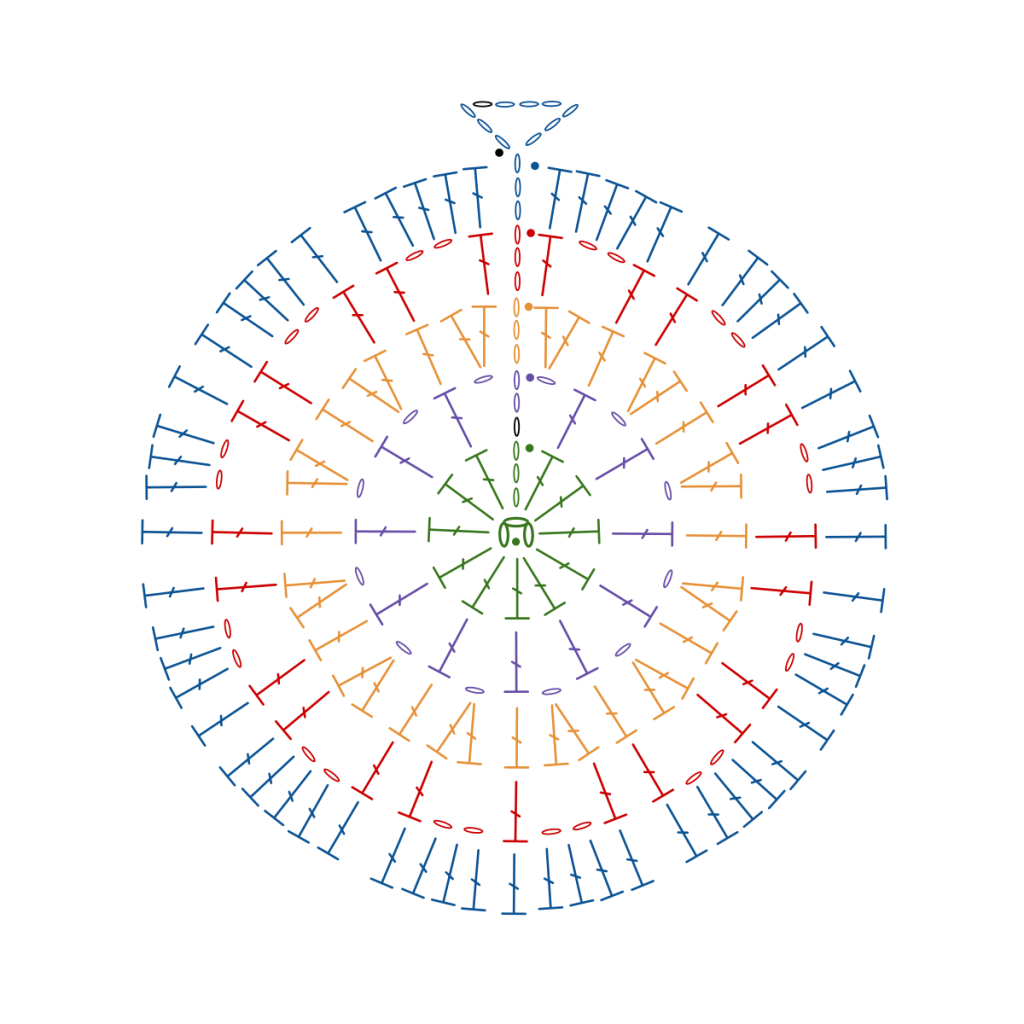
Step 1. – crochet the base.
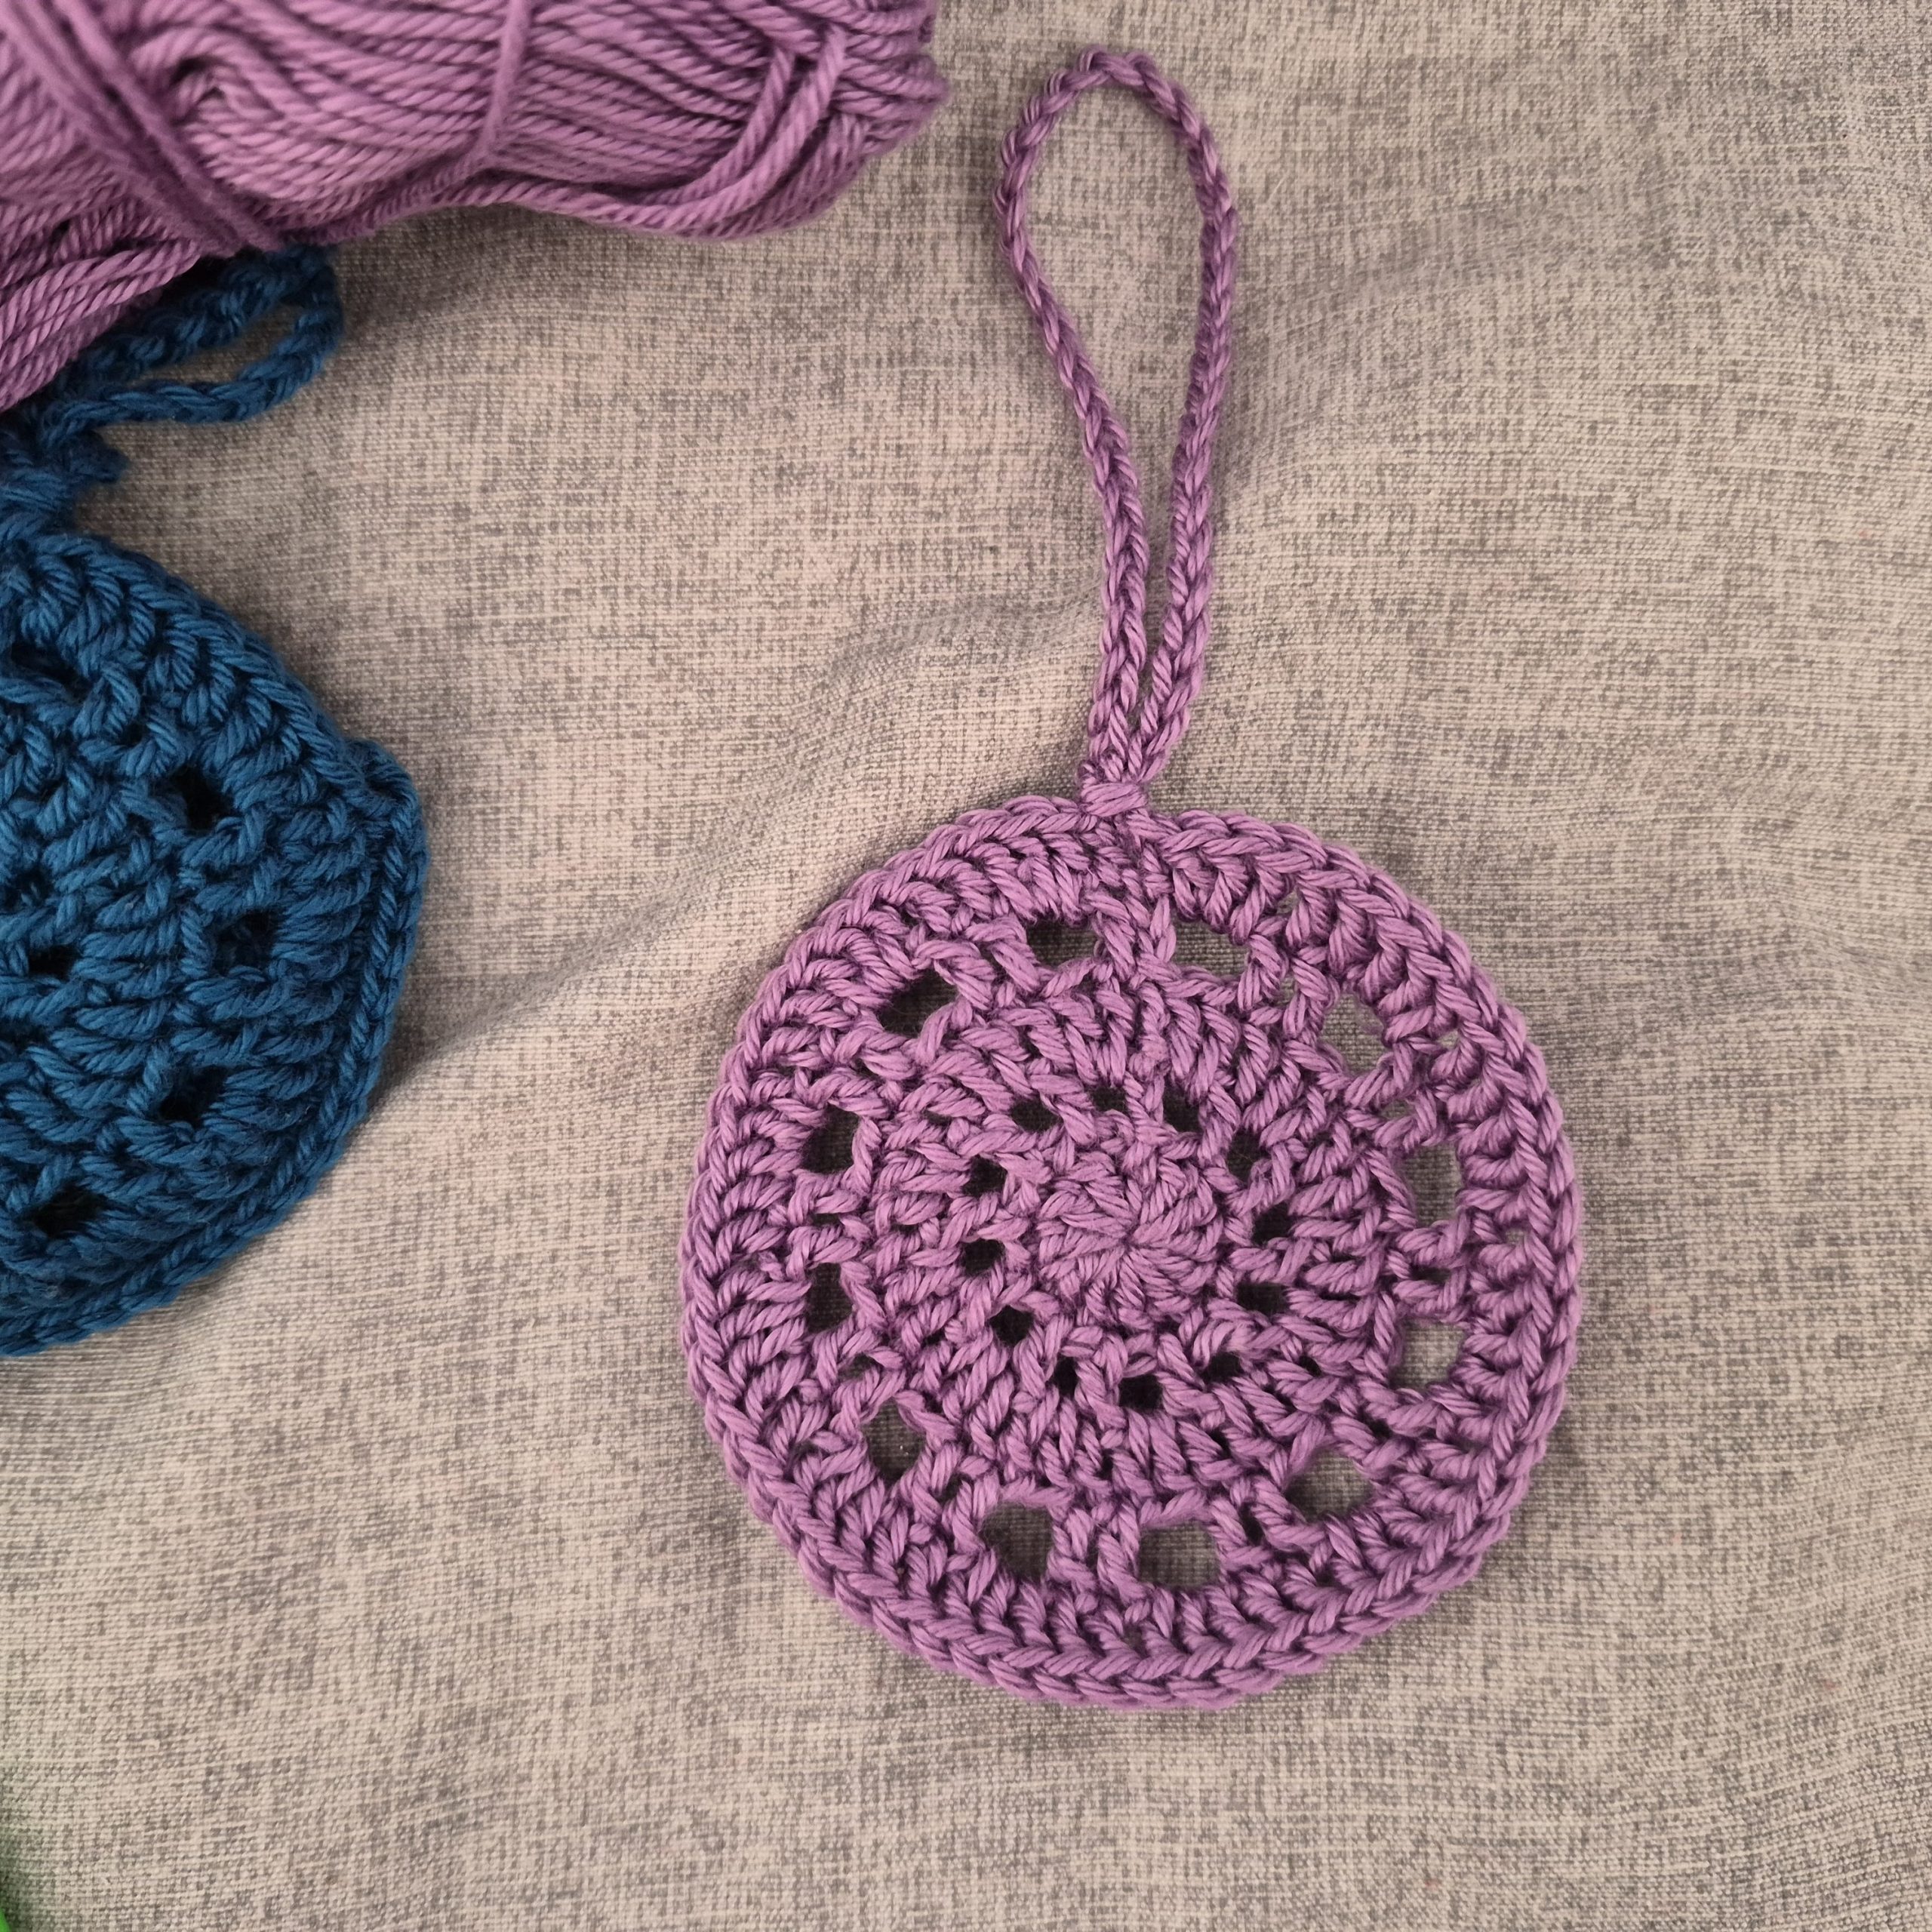
The Base is crochet twice, meaning crocheting two almost identical pieces that are sewn together.
For start you can choose what is more comfortable for you – starting with magic ring, or you can start with chain of 4 closed with a slip stitch.
Round 1 (shown in the diagram in green).
Work 12 dc in MR. Join with a sl st to the first dc. (12 sts).
Round 2 (shown in the diagram in purple).
Ch 3 (counts as dc), *dc in next st, ch 1*; repeat from * around. Join with a sl st to the top of beginning ch-3. (12 dc, 12 ch-1 sps).
Round 3 (shown in the diagram in orange).
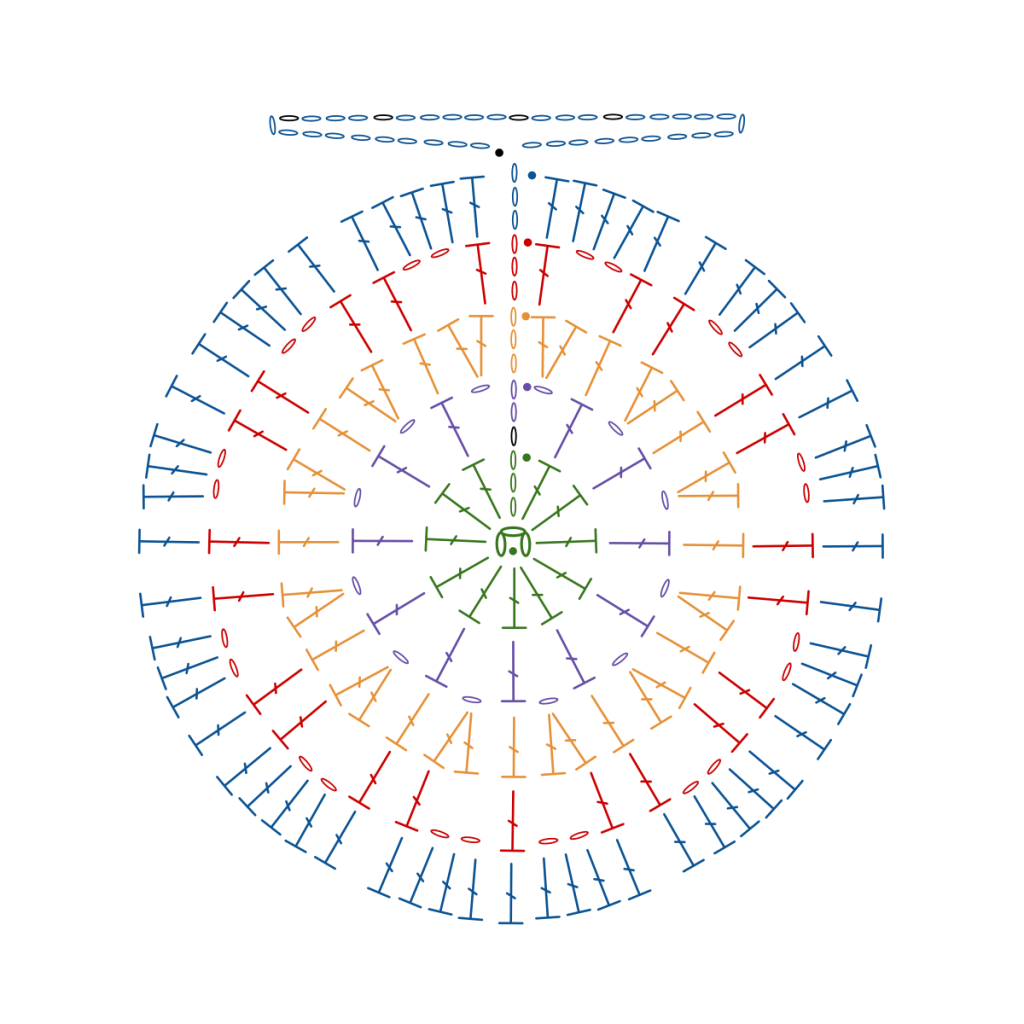
Ch 3 (counts as dc), *dc in next st, 2dc in sps*; repeat from * around. Join with a sl st to the top of beginning ch-3. (36 dc).
Round 4 (shown in the diagram in red).
Ch 3 (counts as dc). Work *1 dc in first and second st, ch 2*; repeat from * around. Join with a sl st to the top of beginning ch-3. (48 dc).
Round 5 (shown in the diagram in blue).
Ch 3 (counts as dc), Work *dc in next 2st, 2dc in sps* around, repeating evenly to create the larger circle shown in blue. Join with a sl st.
Now the only difference between two crochet base circles:
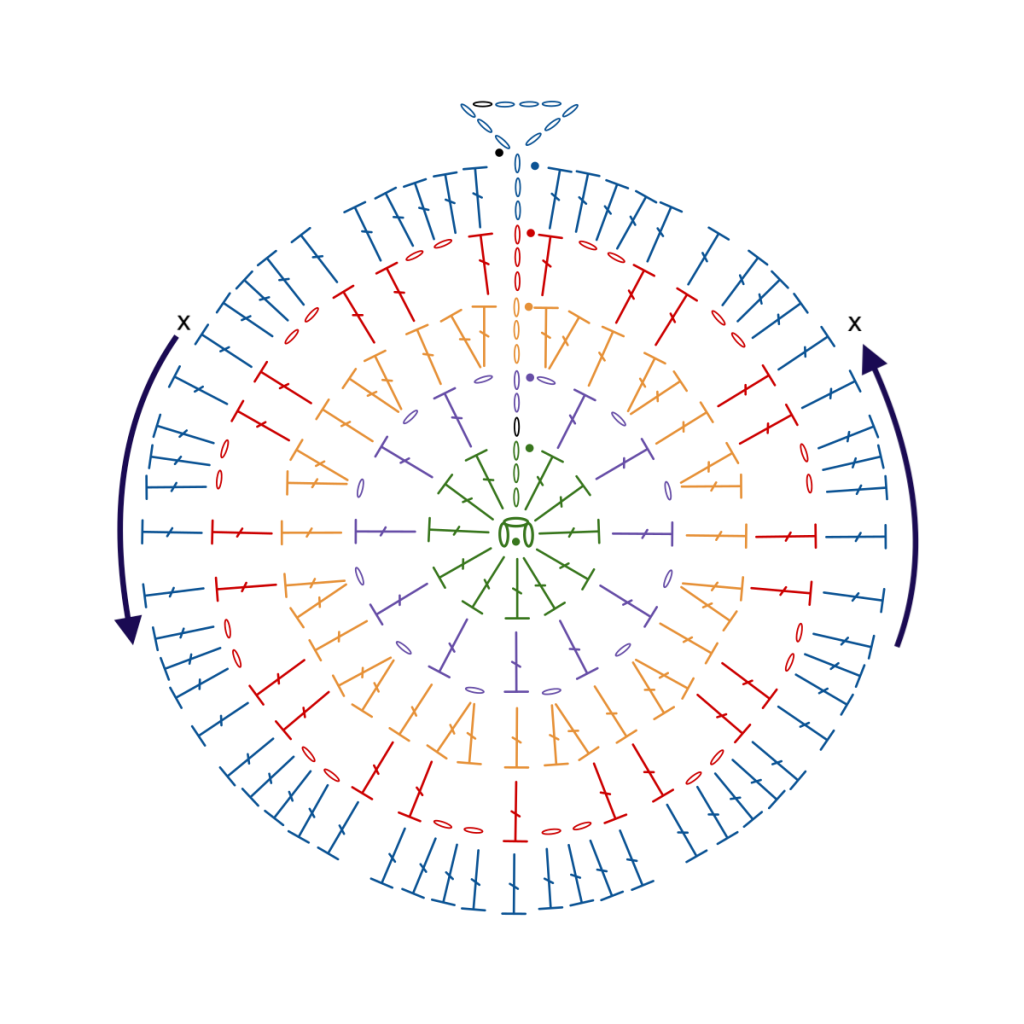
For base number 1: Ch 10 and connect with a sl st at the beginning. And for base number 2: Ch 40 and connect with a sl st at the beginning.
After finishing the two base parts, now is the time do sew or crochet them together. Whether to sew them or to use single crochet or slip stitch to join this to pieces together is your preference and your choice. In the example shown in the video the two base pieces are joined together using single crochet.
Start joining the pieces from the stich right after the second opening two rows below and finish at the same stitch on the opposite side – as shown in this sketch.
After joining the two pieces, now they form a small pouch with one short and one longer loop. When longer loop is put thru the shorter loop, the pouch is closed.
Step 2. – crochet the mesh body.
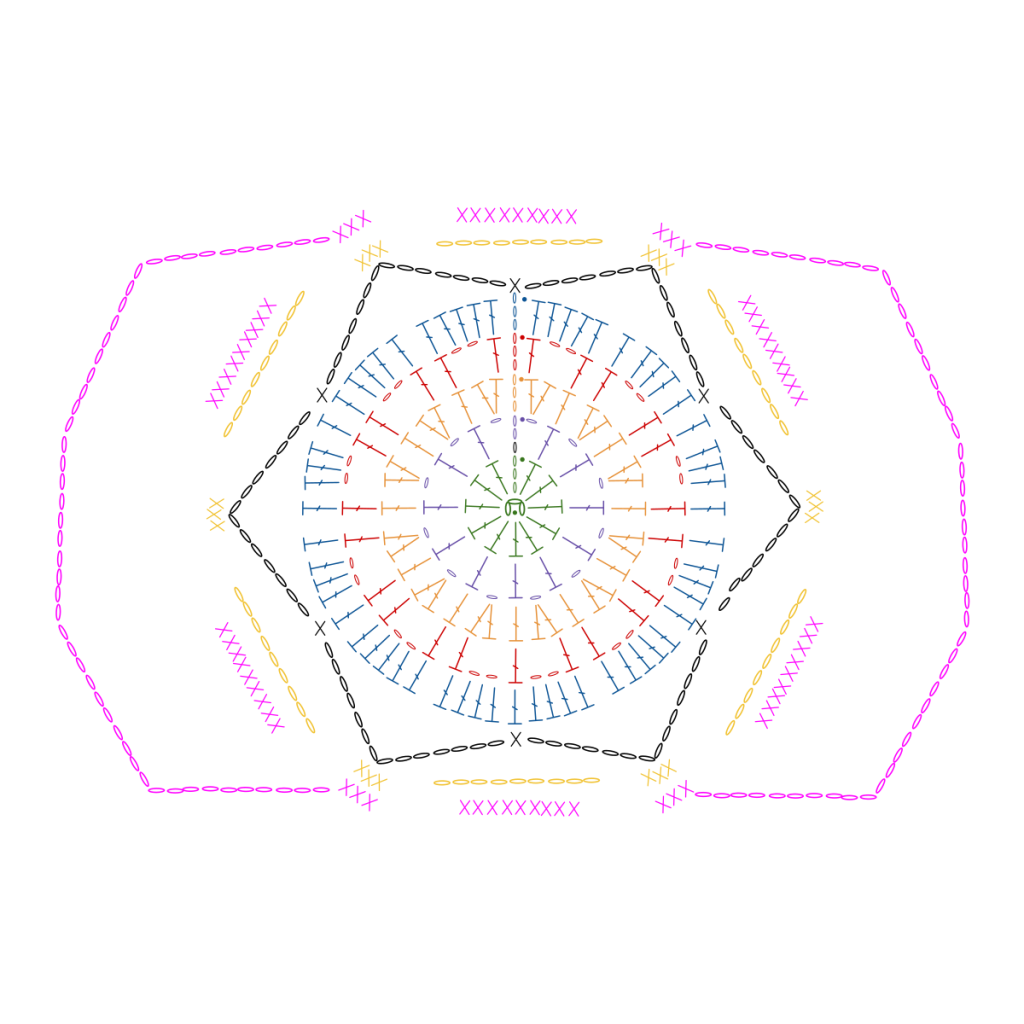
Body Shaping of the Water Bottle Holder is a crochet net. Only first row is shown in the diagram in black pentagon, since the height is optional and to your own preferences.
To begin crocheting the net, first turn the pouch inside out and crochet on this side.
Round 6.
Work around the previous round, single crochet in the in the stitch where the joining of the two pieces finished, ch 14, skip two opening two rows below and work single crochet in the next stitch as shown in the diagram; repeat around. After finishing there will be 6 loose chains as shown on the diagram with black color.
Round 7.
Continue working around until desired height: Sc in the middle of chain of the previous row, *ch 14, sc in the middle of the next chain*; repeat from * around.
Step 3. – crochet the rim and the handles.
Round 8.
When finishing the last chain of the net, 3 sc in the middle of chain of the previous row, *ch 9, 3 sc in the middle of the next chain*; repeat from * around.
Round 9.
Work 3 sc, 9 sc into chain opening, ch 50, skip 4 chains, 3 sc, 9 sc into chain opening, ch 50. Join with a sl st.
For reference see the diagram. The last row and handles are shown in pink.
Also, here are Youtube videos with detailed tutorial and crochet along.
And that’s it! This is very easy and cute foldable Crochet Water Bottle Holder. Now you can show off this cute Crochet Water Bottle Holder – you can put it on your bag as a charm, or open it to carry your water bottle. Also, it’s perfect as a small, quick, and easy to make gift.